
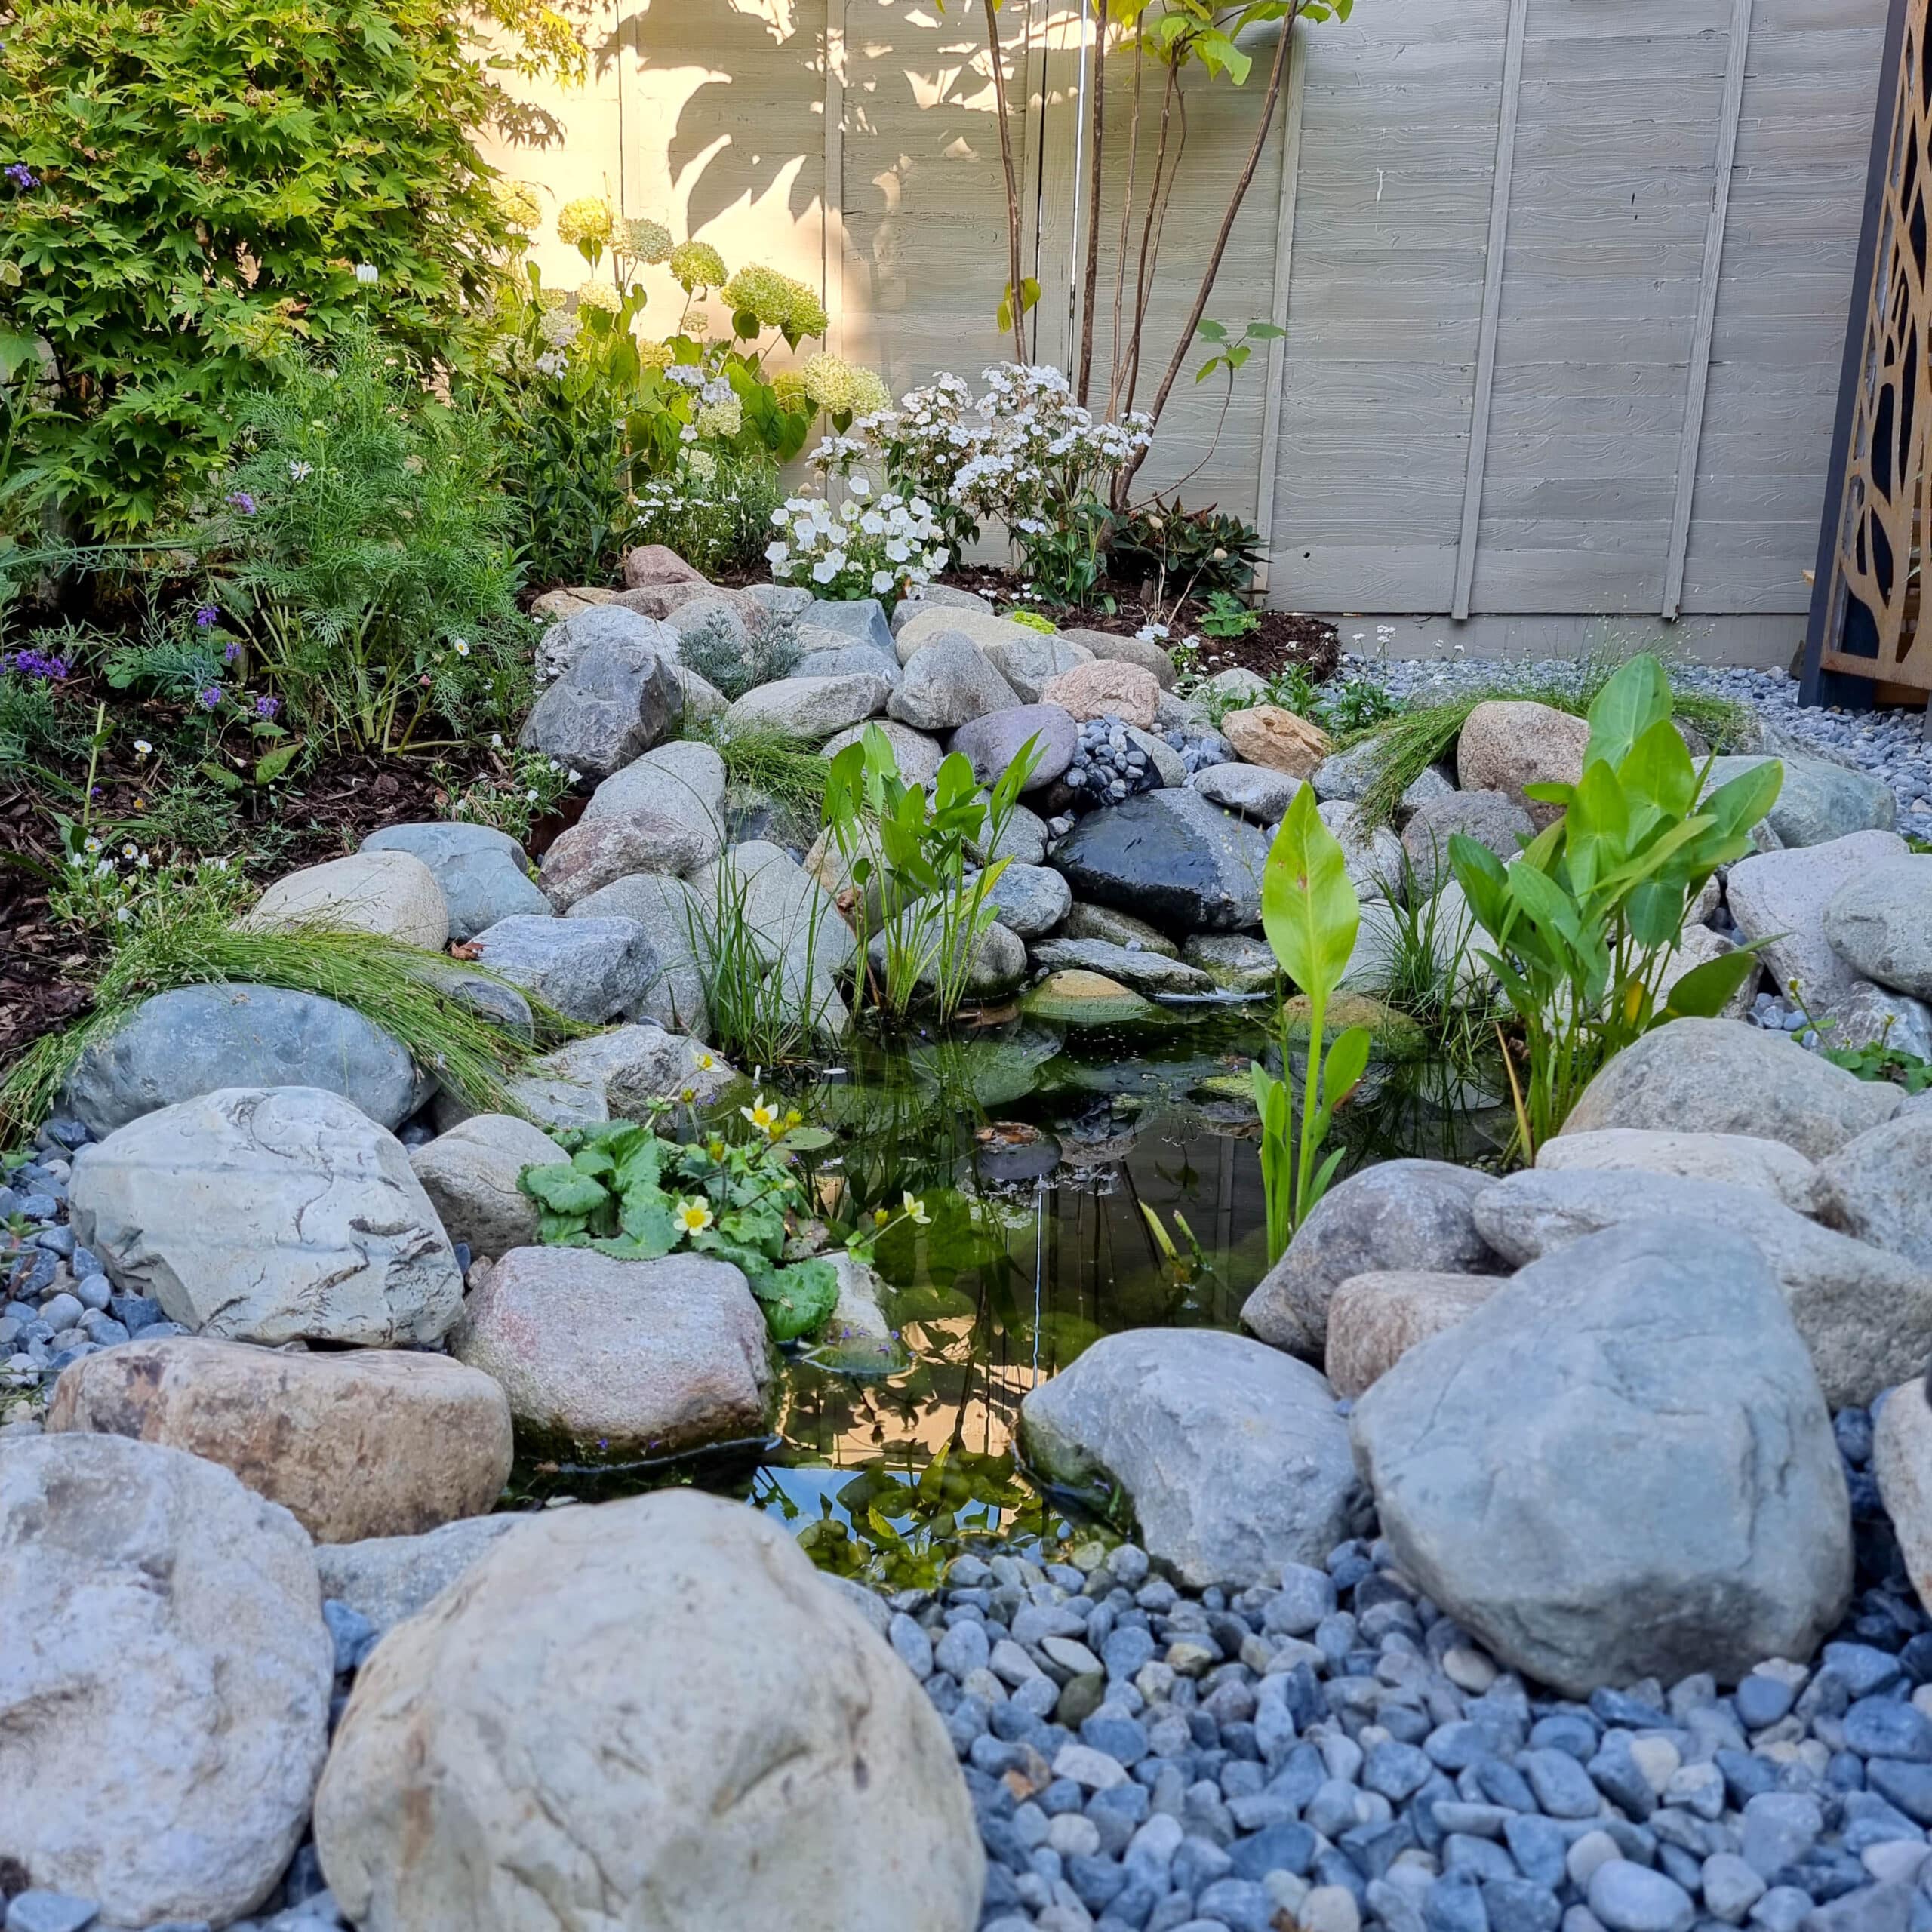
Are you looking at how to build a wildlife pond? Then take a look at the wildlife pond we made in our garden, this is the first time we have built anything like this, so it might not be perfect but it will give you a good idea on where to start and what to include. For those looking to add a touch of natural beauty to their gardens, exploring the intricate process of creating wildlife ponds can be both rewarding and environmentally beneficial.
Video On How To Build A Wildlife Pond
This is the large open space in our garden that we started with, we wanted to create a little hidden haven at the top of the garden and away from the house. Filled with planting, trees, calming white flowers and seating to rest in.

This is the result, which has already started to grow and become more hidden and sheltered. We often see wildlife up here, and it’s only been finished for a few months now. I can’t wait to see what next year brings, the wildlife pond really attracts the birds down for a drink, and nibble on the little bugs too!

How To Build A Wildlife Pond
You need to play around with the shape and sizing of the pond, creating a pond shape that you like the look of. Think about where you will be sitting to look at the pond. We often see wildlife coming down to the pond who don’t even know we are sitting a little distance away watching them.

We used a spray can paint to play around with the shape, working around the pergola posts we have, and planning to have a deeper area and a shallow area.
You need to think of the angle of the water, as water will settle flat, get a cup of water if you want to figure out how your water will lay, moving it around at the same angle as the floor level. You want to create a run-off on the shallow area so the wildlife can climb out if they fall in or cannot climb out.

Start digging out your wildlife pond area, and try and use up this soil somewhere else in the garden. You could use it to build up the height in another area, or around the sides creating a hill area.

This was the first stage, you can see here on the bottom right we have left a shallow area with a slope, you must keep this, or at least plan an escape route for any animals that fall into the pond. As we’re putting gravel all the way around, ours is lined with gravel for them to get up to and walk out.

By going down in sections you can create shelves, these are good for planting up. I wanted to have plants around the edges so these shelves worked perfectly for this.
You can then dig deeper into the bottom to create a depth to the wildlife pond. The RSPB recommends a depth of more than 60cm so it doesn’t freeze over during the winter.

We lined ours with some sand before placing the underlay on as this creates a soft surface to lay the materials over, hoping to block out any stones or anything that could rip the materials.

We have lots of pond liner underlay here, but we doubled it up as we won’t use it up anywhere else, this is then laid under the main pond liner, again to make a barrier between the stones and the delicate liner. You want to make sure you don’t knock any stones in this.

Next up is the pond liner, this is the section that the water gets poured into. Make sure you have excess liner around the edges as the weight of the water will pull it down into all the gaps and get rid of any air pockets.

Fill with water, rainwater is the best water to use, so try and wait for this, but we were in the heatwave months and had no sign of rainwater! So we used the hose to fill up, and then leave it to push out all the creases and air.

We cut a large amount of liner off around the edges but left excess to tidy up once settled.

You can see the weight of the water has pushed all the liners down, and so now we cut off the main pond liner excess and left a small amount around the edges as I wanted to plant up around the edges.

As we were laying gravel all around this area we needed to blend the weed membrane and pond liner together. We used the membrane pegs to pin down the pond liner to the point where the runoff for the pond finished, this is the area we wanted the pond water to stay at, then once the water goes over this section, it will run off into the gravel and weed membrane which allows water through.
The weed membrane is the one with the green stripe down, and this is placed all around the pond area, keeping weeds at bay, gravelled and water being able to go through.

With the rising energy costs I am keen to keep the electricity bill down, and instead of paying to keep the pond fountain going, I found a solar-powered one.

We have placed this on the roof of the pergola which is perfect as it’s away from sight, and plenty of sunshine and as it’s supplied with a long enough cable it’s easily away from the wildlife pond.

It comes with a small remote control so you can turn it on and off easily, and it’s really sensitive so I don’t need to lean up to the panel to control it!

We ran the cable over the first lot of weed membrane down on the floor from the wildlife pond.

Covered over the cable with another piece of weed membrane to protect it a bit more.

and tacked the cable up the back of the pergola where you cannot see it.

We have adapted the solar-powered pond fountain for it to be a waterfall rather than a fountain directly in the pond. We wanted it running down the rocks into the water.

So instead of the pump taking water into the pump and directly out the fountain, we attached a piece of a hose pipe to the outlet hole, so the water is then pumped out of the hosepipe and down the rocks, back into the pond.


Our rock waterfall was created by using the soil dug out from the pond to make a hill. The hosepipe then runs to the top of the hill and turned on itself to then flow back down the hill into the wildlife pond.

Getting the flow of this was really tricky and took us a long time of moving rocks all around to get the right angle, flow, not leaking out the sides and making sure it all went back into the pond! If your fountain is going outside of the pond area, make sure you lay a piece of pond liner on the soil so the water doesn’t leak through as your pond will run out of water pretty quickly. You want to make sure every bit of water is going back into the pond.

The hosepipe is hidden in the rocks under a piece of pond liner, infilling with large rocks and then smaller gravel stones. You cannot plan how this is going to look, you just need to play around with the rocks you have to create the right look and flow.

Planting Up A Wildlife Pond
The next fun part is planting up a wildlife pond, and picking which plants to use, you want to create a selection of plants that each have their own purpose, submerged, floating and emergent plants.
I will list the plants I purchased for our wildlife pond, which were a mixture of plants that are needed for a well-balanced pond.
- Sagittaria Graminea-barerooted
- Sagittaria Japonica
- Mazus Reptans Alba
- Myosotis Palustris Alba
- Ranunculus Aquatilis-nice barerooted
- Nymphaea Candida Miniature White Water Lily
- Aponogeton Distachyos – Water Hawthorn
- Ceratophyllum Demersum (Hornwort)
- Caltha Alba
- Eriophorum Angustifolium
- Isolepis Cernua


Plants from Lilies Water Garden


Plants from Pond Plants Direct
We purchased a crate of boulders in different sizes from Stone Warehouse and you want to get them all to the area you building your wildlife pond at. Just spend some time building up the rocks around the edges, picking out once that work together and are stable on top of each other.

Make sure you place rocks into the water as well, this builds up the stability for the ones at the top. Use the shelf you have built when digging out as a ledge. As you’re going around add in your suitable plants, each plant has certain requirements for depth and light. So pick the ones that suit each space you’re putting it in.

Use the rocks to support your plants, getting them to sit in the water and placing rocks in front. This keeps it in place and under the water easier.

Just spend some time playing around with the rocks and plants to create a nice relaxing area for a natural look. I wanted a white theme up here, so all my plants have white in the flowers. I picked some that would cascade over the rocks, stand tall and stay low in between the rocks.

I am really happy with the choices I made, and how we have zoned the garden, but some haven’t made it and I don’t know why but it’s all a learning curve. We also installed our wildlife pond in the heatwave months, so maybe some haven’t liked the heat we had.

But it doesn’t matter, it’s all part of it and I will learn what works in this space and what doesn’t.
Maintenance Of A Wildlife Pond

Once established a wildlife pond should look after itself. You need to get a balance with the plants, making sure they’re all doing their job and keeping the pond clear. However here are a few things you could do to help it along.
- Place barley straw in the pond, you can also purchase it in a liquid form
- Give the pond plants pond plant feed regularly
- Keep the pond clear of debris
- Make sure run-off area is kept clear for animals to get out easily
- Control algae growth
- Clear out any pond weed that could take over
- Top up with rainwater during the summer months
- Try to keep it from icing up during winter if the animals are in it
Shop The Items
- Ocean Blue Gravel – Stone Warehouse
- Crate Of Boulders – Stone Warehouse
- Solar Powered Foutain Pump – eBay
- Pond Plants – Pond Plants Direct – Lilies Water Garden
- Pond Liner and Underlay – Amazon
- Barley Straw Liquid – Amazon
- Barley Straw – Amazon
Good luck with building a wildlife pond, I hope this has helped you learn how to build a wildlife pond, and on your way to having a small pond in your garden that encourages wildlife and looks nice for you to enjoy.
2 Comments
I love this idea! We are trying to make our backyard more bird-friendly, as birding is my favorite hobby. We already live on a retention pond, so we get larger wading birds, but I think this could help with the smaller songbirds.
Thank you, I love having the little birds coming into the garden so hopefully bring some more in