

I’ve wanted to share our garden reveal featuring our DIY Pergola and DIY Wildlife Pond for ages, it’s been a massive labour of love for us. Every weekend and many extra days in the week have been put into this new area of the garden, and the hard work has paid off. We love it so much, but I wanted to get it all finished off perfectly for you, to show how lovely it really is…..so here is our DIY garden reveal
Video Tour Of Our DIY Pergola and Wildlife Garden Reveal
We’ve been able to test out the DIY pergola lots in this sunny weather, and it’s been a perfect place to sit under, away from the sun and tucked up in the corner of the garden. I can’t even believe it looked the way it did a few months ago! So now to show you the before and after!
DIY Garden Reveal Before


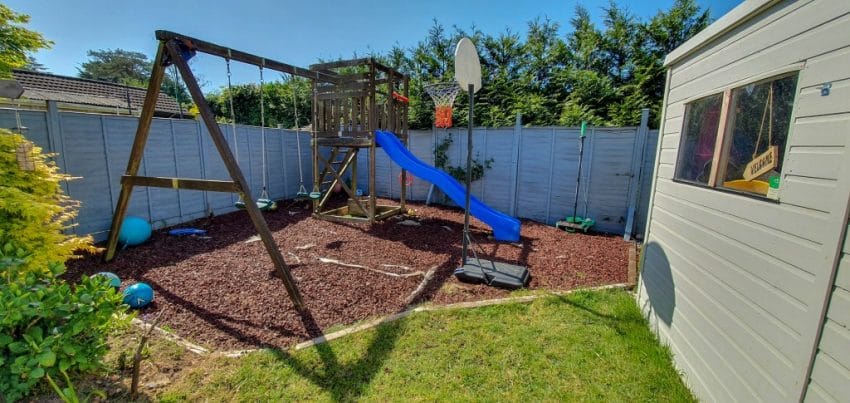
This picture below was in 2012 when we viewed the house!


This was when we had moved in and started to clear the garden. We had old rotten sheds and greenhouses, and we wanted a large open space for the kids. I wasn’t into my gardening then either, so I didn’t have the ideas in my head to do something out of the box. I do now!

So a few years down the line, and a few more flowers we now look like this and we love it so much.

So how did we do it?!?
I am going to give you a brief (can’t really be brief with the amount of work we’ve done!) rundown of the process, and I will then pop in some more detailed posts on how we really created each section, so you can give it a go yourself if you love it that much!

First, we worked out the space we wanted, where things were going to go, and what materials we wanted to use. We have painted our fences in Nude Taupe from Protex paint, and the shed and garden screening is painted in Urban Slate by Cuprinol Garden Shades. So we stuck with these colours to bring the whole garden together.
Behind our shed is a bit of a dumping ground and where the dog goes, so here we built a batten screen to create privacy from neighbours, and to hide our dumping ground! I purchased evergreen climbing plants, so they will climb up here and hide the whole area.
These were made from two fence posts, and pressure-treated 22mm x 47mm x1800mm battens, with a 22mm gap in between.

Next, we moved on to the pergola. Setting 5 large fence posts into the ground using postcrete. We used these large fence posts to keep the pricing down, you could use a more finished post if you prefer, but these were 100mm x 100mm x 2.7metres

As you can see they are not finished well, with rough wood and little nicks and lines in them. This is the downside of them being cheap! However, I used my Ryobi cordless hand sander to sand down all the sides to create a much smoother finish. It doesn’t get rid of the little gaps in the wood though.

We nicknamed it ‘Woodhenge’ at this point!

Next, was the edging to support the roof and structure,.This needed to be well thought out as it needed an angle on it to let the water run off it.

More roof noggings to create the roof structure. We placed them laying flat so they didn’t stand out as much from the underside.

Once all the rough wood was sanded down, I painted it all, my neighbour has said I have a paintbrush permanently in my hand!

Roofing
We wanted our pergola to have a roof so we could sit out of the sunshine, and keep the area clean and dry. Then we used large structural plywood sheets on the roof. We gave them one coat of paint before putting it on the roof.

You need to make sure you do the roof in one dry weekend, this plywood sheet wood isn’t meant to get that wet. It can be used outside, but not to constantly get wet. So once it’s attached then you need to felt the roof asap, making sure all the gaps are sealed and no water can get through.

When the felt was on, we knew we needed to create a fascia along the edge. I had a great idea whilst watching RHS Chelsea Flower Show…….why not create a flower planter along the top instead?

Roof Planter
Now, this took a lot of planning and designing, it needed water, not leaking but able to drain and then somewhere to drain into. We were going to put a gutter system in and water butt for rainwater, so this just needed extending.

So it’s been lined, drainage holes and reservoir cups for watering. Although even those are struggling to keep up with this heatwave, and now our hosepipe ban!

I purchased some plants from Crocus in 9cm pots, which fitted perfectly in the space and were filled with soil and kept my fingers crossed!
- Hedera helix (Ivy)
- Erigeron karvinskianus
- Carex comans Frosted Curls

A few weeks later! We did lose a few on the other side that gets much more sun and dried out too much, but hopefully, when we get a bit of rain we will get them back ok! I love them though, think it really blends into the area and softens the wood and roof area.

Guttering and Waterbutt
As we have a lot of plants up here we wanted to be able to water them easily, and save water. So we’ve installed a guttering system and waterbutt. This means all the water from the roof can run off into the gutter, and then any extra will gently flow out into the stones where we have dug a soak away as well.

The overflow from the new planters also runs into this gutter as well, so no wasted water here!

Modern Square Arches
I love the look of modern square arches and thought having them leading into the pergola area would lead your eye in, also it would be a space to add more plants at height and create that hidden look I am aiming long term for.

More sanding and more painting!

Project Wildlife Pond!
We’re keen to create a space that encourages wildlife, and somewhere where we feel we can switch off and relax. So a pond needed to be added, not a fish pond, just wildlife. With plants, and hidden places for the bugs to live in.
We dug a hole! Working around the pergola posts, and not in the walkways where we can fall in, we created a shape. It ended up looking like a kidney or a heart.

Sanded it, fleece lined it, then pond liner in it, then ready to fill with water.

Then the gravel arrived! We spent a weekend carrying buckets full of stones back and forth through the house, the downside of building an extension right to the side of your boundary! We used Ocean Blue gravel from Stone Warehouse which was the same as the gravel path we installed.

We also ordered a crate full of boulders for the pond. Creating an edge around the pond of stones where we can plant in between, and around. Next year they should have spread nicely and created some nice shady areas.

We’ve already had a few visitors of dragonflies and damselflies, which is amazing to see., along with plenty of birds coming down to drink water.

A pond is a big learning curve, from keeping the water clear, feeding plants, the depth of plants, and what grows where! We have quite a bit of build-up of algae on the stones under the water, but the water seems clear now.

We’ve installed a small waterfall into it as well, tricking down the rocks into the pond area. We can sit here with the sounds of trickling water.

Corteen Steel Screening
We had a big problem with Screen With Envy when we placed an order with them in March, put it this way the items still haven’t arrived and it’s August (it’s now with the bank claiming it from them) The reviews are terrible on Trustpilot and they delete their comments on social media, so don’t be fooled by their great marketing.
We ended up purchasing them from a local company online, and they arrived perfectly. With most corten steel they arrive in a brand new look and silver shiny, but once the water has got on them they rust up. These ones are taking quite a while though, but we’ve had no rain.

I love the detail they give to this space, all well as another shot of warmth into the space.

I love how the lights shine through the space when lit up inside at night, creating such a pretty look to the space.

Corteen Steel Edging

Up our garden path, we have installed corten steel edging to support the path, I love the subtle look of this as well as being super hardwearing, unlike plastic ones that snap easily. So I lined our new flowerbeds with this to bring it all together and flow nicely. The screening will turn this dark once it’s aged more.
Larch Battening Installed
I love Larch batten fencing and thought adding it to our pergola would warm up this area with the warm wood colour, add privacy and create a ‘room’ feeling. It really did do all of that, and it’s such a nice colour.
We used the most amazing but scary DIY tool we own! We have lots of Ryobi tools, and they gifted me this nail gun to complete our larch batten screening project. It made the job of installing the battens so quick and easy, and the battens feel so secure and well-fitted.
We have created batten fencing before without a nail gun, and this made it so much quicker and more secure. I wish we had one for the other jobs now!! I will create a full post on how we built the screening, and what I thought of the nail gun.

As you can see the Larch battens really do warm up this space, I have used Osmo oil on them, so the colour won’t silver with age and stay that warm colour.

Solar Powered
Everything up here is solar powered, we were going to install electrics but for now, we’re going to leave it as the electric costs up going up so much that it’s nice to be able to use a natural free source if we can create the same look.

I was kindly gifted some solar panel lighting for this project from Lights.co.uk. I didn’t think I would be able to get lights that could go inside the pergola as a solar panel one, but I can! The wall lights have a long wire which connects to the panel which we have placed on the roof. We have 4 all lined up! But they are getting plenty of sun up there!

These glass lanterns are battery packed but could be either placed on the floor, coffee table or hung using the handles. They create warm flickering candlelight, which is very subtle but effective.

Then 4 spotlights are placed at the base of the arches, lighting those up from the bottom. As these have their own solar panel on them, you can place them anywhere you want.

Doesn’t it looks so warm and inviting now, it’s such a wonderful space up here and I will be spending many nights up there chilling out.


We even have the pond waterfall powdered by a solar panel!

Great Entertaining Area
We’ve had a few people over since we completed this space and it’s just perfect for it, plenty of seating, cool, out of the sun, plants surrounding you, and away from the noise of the house. I love getting a drink and taking it to the top garden, and switching off for 5 minutes.

I created a little lunch for us using the Artesà Marble and Acacia Wood Serving Board to pop a cheese and crackers selection on. It’s amazing quality and meant I could carry it up to the garden easily and we could help ourselves. The KitchenCraft Acrylic 1.7 Litre Juice Dispenser was filled with Pimms and used one of the Maxwell & Williams Wayfarer Bowls to hold the crisps. It felt like we were on holiday up there, and the kids didn’t disturb us once!

Planting Flowers
My overall plan for this area is to have it filled up with flowers and shrubs, I have picked a colour scheme of white to run through the flowerbeds and pond area. This is to keep it calm, and easy on the eye.

We have placed a couple of trees that we picked up in garden centre sales, so this gives us a instant impact and privacy straight away, the planting next year should be much fuller once they’ve been established.
Overall Thoughts
So I hope you like our new area of the garden and this garden reveal, we call it ‘The Top Garden’ which sounds so snobby when we say shall we sit in ‘The Top Garden’ it sounds like we live in a mansion!! It’s such a lovely space for us to enjoy, we have and will use it so much. So it was all worth the hard work, and time it’s taken us. However it would have cost so much more if we had hired someone to do it for us, so we’ve invested in this area but at least there were no labour costs.

Here it is the morning, the sun shining through for me to have my mid-morning coffee sitting under here watching the birds coming down for a drink.

These two love it up here too, often found taking a chill out on the sofa with me!
Top Tip: We ordered so much from Wickes as they offer free delivery over £75, named day delivery and they have great delivery u tracking on the day. They often were a great price on landscaping materials, and it meant we could order in groups of items as we went along, rather than bulk buying large quantities and storing them whilst we were building.


Shop The Items From Our Garden Reveal
- Nude Taupe Protek Paint – Amazon
- Urban Slate Cuprinol Paint – Amazon
- Pressure-treated 22mm x 47mm x1800mm battens for screening – Wickes
- Pressure-treated fence posts 100mm x 100mm x 2700mm – Wickes
- Treated Kiln Dried C16 Timber – 45 x 145 x 2400 mm – Wickes
- Treated Kiln Dried C16 Timber – 45 x 145 x 3600 mm – Wickes
- Postcrete – Wickes
- Structural Plywood 12mm x 1220mm x 2440mm – Wickes
- Galvanised Clout Screws – Wickes
- Shed Felt – Wickes
- Waterbutt – Wickes
- Artesà Marble and Acacia Wood Serving Board – Cook Serve Enjoy (Gifted)
- KitchenCraft Acrylic 1.7 Litre Juice Dispenser – Cook Serve Enjoy (Gifted)
- Maxwell & Williams Wayfarer Bowls – Cook Serve Enjoy (Gifted)
- Ryobi Nail Gun – Amazon (Gifted)
- Ryobi Palm Sander – Amazon
- Larch Battens – Timberulove
- Coffee Table Rug 120 round – Amazon
- Sofa Set – Warehouse Clearance Store
- Gravel Ocean Blue 20mm – Stone Warehouse
- Cambrian Boulders 100-200mm – Stone Warehouse
- Pond Plants – Pond Plant Growers Direct & Pond Plant Growers Direct
- Garden Plants – Crocus
- Outdoor Lighting – Lights.co.uk (Gifted)
- Outdoor Cushions – Ragged Rose
- Corteen Steel Edging – Primrose
- Plant Pots – Haskins
- Corteen Steel Screens – Farm and Garden Supplies
- Solar Power Water Fountain – Amazon
6 Comments
Wow, wow, and wow – this is beautiful Steph. I’m wanting something just like this and this has given me lots of inspo!
Kay | http://www.mummyburgess.co.uk
Thank you very much, it’s such a wonderful space. Have fun designing yours!
Wow, how stunning – what a labour of love! Looks like it would have been the perfect place to enjoy the recent heatwave x
It really was, but enjoying the hard work now and such a lovely place to make you stop!
Oh wow, it’s absolutely beautiful. Congratulations! I’m heading over to YouTube now to watch your video….
Ah thank you very much, glad you love it too. It’s been lovely to do it ourselves and create a bespoke space