
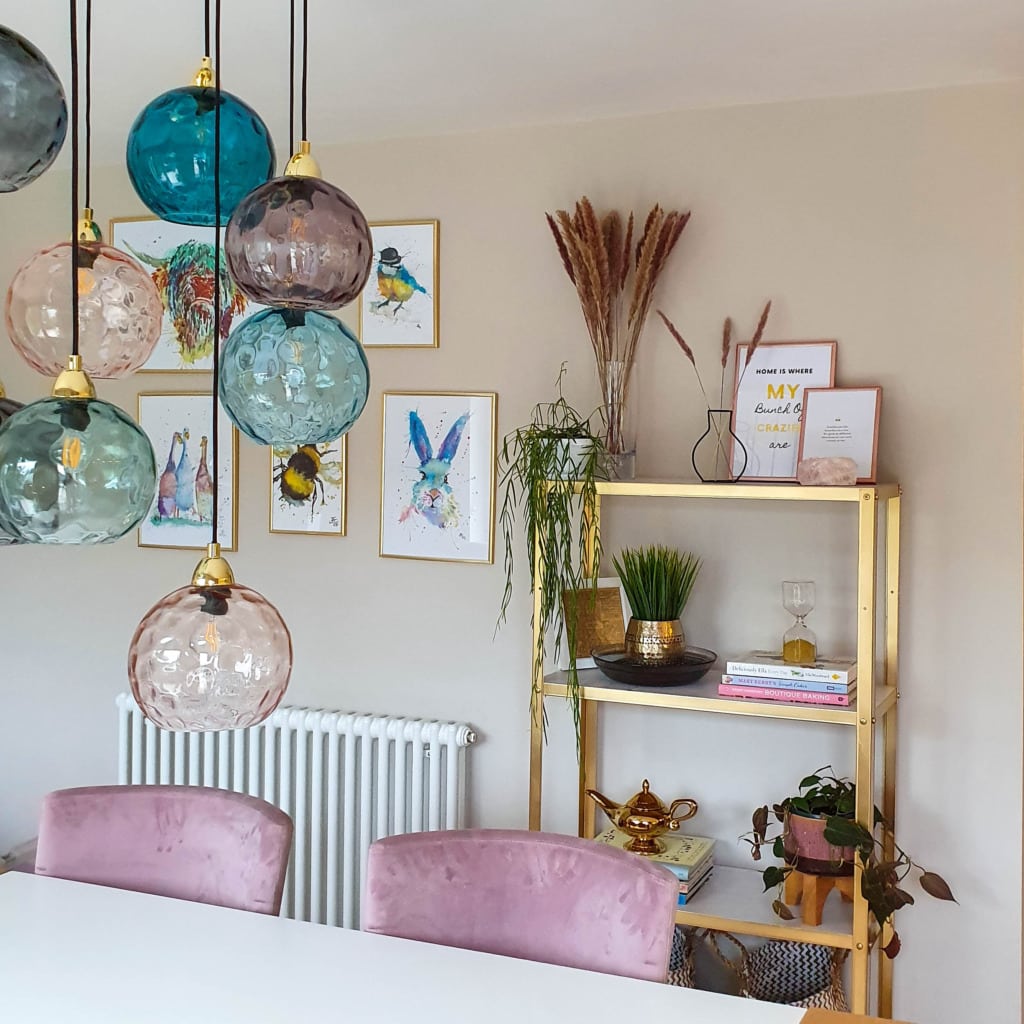
Are you looking for a budget DIY gold and marble shelving unit? Love the expensive gold and marble shelves but don’t want to spend that much on them, make a DIY gold and marble shelving unit from a £12 set of shelves!
Video On How To Build This DIY Gold and Marble Shelving Unit
Having some new spaces to decorate and fill in the house is super fun, it allows us to have a play around with the interiors and some fun DIY crafts! I now have a large open kitchen dining room that needs some items on the walls and interest put in. I love gold in my home and have loved adding colour to the house, but as popular gold currently is it is much more expensive than other coloured items on the market. I have seen plenty of gold shelving units for over £400 but I wasn’t going to pay that for one, so started to think about creating my own DIY gold and marble shelving unit.
I love spray painting items, I was able to spray a few items in the utility room recently to get the desired look I wanted cheaper, or to repurpose items to pull them into the new colour scheme. So thought about spray painting some metal shelves to get the gold look I wanted.
I’m over the moon with the look of them and total price of around £60 instead of £400+

How To Make A DIY Gold and Marble Shelf
I didn’t realise the galvanised metal shelves were so cheap, IKEA do an IKEA Hyllis shelf for £10 but we needed to get some plumbing items at B&Q and I spotted they do the exact same IKEA Hyliis shelf for £12. So this is the shelf we went for.

4 Shelf Steel Shelving Unit From B&Q £12

Decide which parts of the shelving unit you want to spray up gold. I wanted everything sprayed apart from the flat tops of the shelves. So I wanted all the sides of shelves gold and even the undersides. This made spray painting nice and easy!

All the pieces were laid out flat and I could spray every part I could see. It needs two coats of spray paint to give decent coverage. You need to spray light layers on otherwise the paint runs and doesn’t leave a nice finish.

The screw heads will be seen in this shelving unit, so make sure you spray these gold too. I found it easiest to spray them in place when I did the 2nd coat on the support bars.

You need to leave 30 minutes in beween each coat.

Once you have done the 2nd coat on everything, then turn over the support bars so the other side is showing, then do the two coats on this side.

I used 3 spray paints to cover these shelves, but it was quite windy that day so maybe you would get away with 2 on a calmer day! I didn’t used up all of the 3rd one.
Making The Gold and Marble Shelves
Once you’ve left everything to dry for 24 hours you can now start on the gold shelves. I purchase a contact paper that has a gold-tone marbling throughout. Contact paper is a double-sided sticky paper, and once you pull off the backing paper you can stick this flat to the surface.
Start with a very straight neat cut line to line up the edge of the shelf, I used a steel rule to run my paper cutting knife along giving me this edge.

TIP: The spray paint comes off easily when metal runs along, so pop something along when cutting so you don’t run a scratch down it.

Turn your shelf upside down so it’s laying on the contact paper and cut around the outline of the shelf, this gives a cut out of contact paper big enough to cover the flat shelf top.

Start by picking your best front edge, the shelves can be turned around so either long edge can be the front. Then place the front edge of your contact paper on the top front shelf edge, line perfectly up with the edge and stick down.
Rub with the soft cloth all the way along as your peeling off the contact paper backing, pushing out any air pockets and leaving a flat neat surface. It’s quite easy to pull back off if you do get an air pocket trapped, so keep an eye on it.

I used 2 packs of this contact paper to cover all 4 shelves.
Build Your DIY Gold and Marble Shelving Unit
Once you have added contact paper to all 4 of your shelves you’re ready to build your unit. Use the instructions that come with the unit but before putting together pick out your favourite places pieces of the unit. Look for marks in the spray paint, where it’s run or not quite taken and place those pieces in the area you won’t see!
The support bars will have two that face outwards to the front, so place those forward facing. Pick out your favourite shelf that will go on the top at eye level, and the edge that looks the nicest!

TIP: I didn’t end up spraying up the nuts, but you can do.
TIP: Be aware when putting the shelves together every time the shelves touch and rub they will scratch!

All built together and now you’re ready to go and style up!

How I Styled Up My DIY Gold and Marble Shelving Unit
This was the final piece all ready to go. I was so surprised how nice it turned out and I was excited to get it styled up!

I’ve popped a shopping list of all the items I have purchased for this DIY gold and marble shelving unit at the bottom of this blog post.
Shop The Look
Amazon Products
IKEA Hyllis Shelving Unit £10 – IKEA
4 Shelf Steel Shelving Unit £12 – B&Q

Black Swirl Bowl Wilko – White Box Frame Wilko – Fake Plant Wiko

Pampas Grass Amazon – Wire Vase Amazon – Spray Painted Frames Wilko – Rose Gold Spray Paint Amazon
Hoya Linearis Hanging Plant Real Beard & Daisies – Pink Quartz Tealight Holder Natural History Museum –

Aladdin Gold Lamp Primark – Hanging Philodendron Beard & Daisies – Plant Stand Homesense
Two Wicker Style Belly Baskets Amazon
Free Print Downloads
Do you like the prints I have in the frames? Well, I have offered them here for a free print out! These will be printed plain without the foil as this is something I’ve added on myself.
HOME IS WHERE MY BUNCH OF CRAZIES ARE PRINT & FAMILY ROOTS PRINT

17 Comments
Gold and Marble Shelving Unit looks so beautiful and is pocket-friendly too! Thanks for sharing the step-by-step DIY tutorial
Thank you very much, love how budget-friendly it is!
The shelving units look stunning, you have done a really good job. I just adore those light too
Thanks! The lights are beautiful aren’t they
DIY and me do not get along. however, you clearly are good with diy as this gold shelving unit looks really good x
Ah thanks, I love a little project to get my teeth into!
What a great transformation, you’d never recognise them. I love the Hare print it looks gorgeous in the gold frame.
Thank you, I was hoping it would be unrecognisable! Their pretty pictures aren’t they, love the colours
Wo so impressive! Bet it felt like such an achievement and it looks really great 🙂
Thank you, great to put something like this together
I love a DIY project, it looks fab and you have done a great job! The gold and marble make a great pairing and I also love you colourful glass lights!
Thank you, the lights are amazing aren’t they!
Where are the lights from they are lovely
These shelfs are just so gorgoeus!! I love that you added a marble paper to the shelf. Makes then look really expensive.
Would never know its £12, would you!
Those shelves are absolutely beautiful. I’m rubbish at anything DIY. I can’t even put a picture up.
You need command hooks, no hammer involved! But thank you very much